This is a tutorial to show how to use LandSat imagery to create ‘true’ colour (and eventually false colour) satellite images of the Earth using GIMP (although very similar techniques can be applied to other software packages).
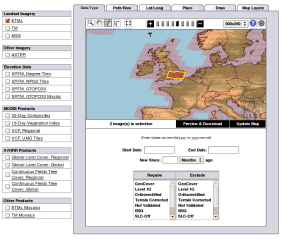
First download data for the area of your choice; the best place I have found for doing this is http://www.landcover.org/data/landsat/. If you know the exact coordinates for the area in WRS (Worldwide Reference System) notation then proceed to the FTP download section, if not then click the download via search and preview link. Next click on map search and select ETM+ on the left hand side to make sure you’re using the most up to date LandSat Imagery, hit update map. Then use the map to navigate to and select the area of your choice, for my example I chose South East England.
Now proceed by clicking Preview & Download, select the scene of your choice on the next page and click download. You should now be presented with a bunch of files to download, these correspond to the different spectral bands that LandSat 7 obtains data for. In order to produce ‘true’ colour images we need bands 1,2 and 3 corresponding to the blue, green and red parts of the visible spectrum, for false colour images we will need different bands. So for the area I chose I downloaded files p201r024_7t20000619_z31_nn10.tif.gz, p201r024_7t20000619_z31_nn20.tif.gz and p201r024_7t20000619_z31_nn30.tif.gz, your file names will be similar but not identical to these (well unless of course you want to do this for SE England). These files will need to be extracted and then we can import then into GIMP!
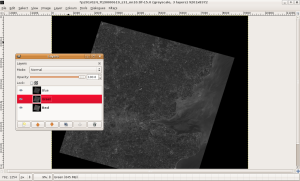
Open up one of the images in GIMP, for simplicity I chose the file ending in 10 corresponding to band 1. Open up the layers dialog (ctrl + L) then rename the background layer as blue, so we don’t get confused. Now click file -> open as layers and open the other two files, ending in 20 and 30. Now rename these layers as green and red respectively. You should now have this sort of set up…
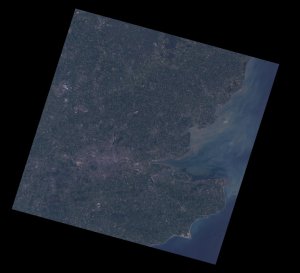
We have the 3 visible light channels as greyscale layers in GIMP (don’t be scared if your computer is having a little bit of trouble with the processing here, these files are very large! just be patient). Now we need to colour the 3 layers and merge them together. To do this, first change the mode of the image to RGB (Image -> Mode -> RGB). Now select the red layer and colourify it to red (Colours -> Colourify -> then select red), do the same for the green and blue layers but obviously colourify them to green and blue respectively. Now we have the 3 layers all the in right colours but you may be confused that you can only see one colour, that is because that layer is on top of all the others. We need to change the mode of each of the layers to Screen in the layers dialog box. Now you should have a lovely true colour image of your area, just need to merge the layers (Image -> Merge Visible Layers) and you have the desired result to save in any format you wish! One more thing, the image may not be as sharp as you would like so you can play around with the contrast and brightness etc to get it just as you like. This is my finished true colour image of South East England…
Okay now if you want to get fancy you can produce some false colour images of your area. The table below shows the spectral sensitivity of the bands of LandSat 7. You can use these in any combination you please, just import different files into GIMP. For example instead of 1,2,3 as blue, green, red use 7,4,2 for red,green, blue. This is what I did in my project in order to highlight urban areas.
| Band Number | Wavelength Interval | Spectral Response |
| 1 | 0.45-0.52 µm | Blue-Green |
| 2 | 0.52-0.60 µm | Green |
| 3 | 0.63-0.69 µm | Red |
| 4 | 0.76-0.90 µm | Near IR |
| 5 | 1.55-1.75 µm | Mid-IR |
| 6 | 10.40-12.50 µm | Thermal IR |
| 7 | 2.08-2.35 µm | Mid-IR |


[…] Using LandSat imagery in GIMP […]
Thanks, a good and concise summary of the “true colorization” process for the novice, that showed me I’m heading in the right direction.
Thanks for this Blog entry!
This was very helpful information for me!
Christian
Landsat and GIMP
Excellent articles. I want to use Landsat to extract physical features to make my own maps. I use GIMP, Global Mapper 12, Inkscape and other programs.
Would you be willing to help me with Landsat and GIMP?
I wish to communicate direct by e-mail.
In hope…
Chris